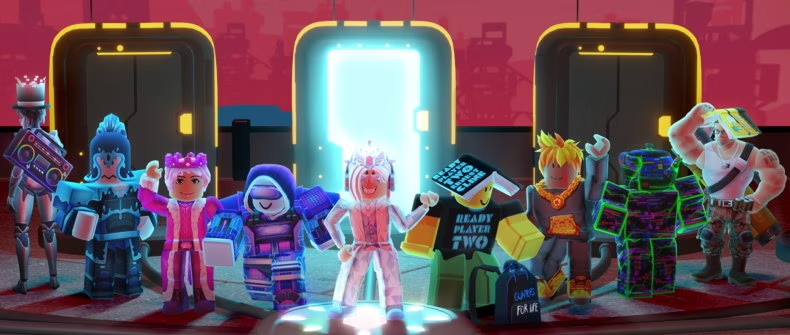
Ready Player Two Event Still Available!
Get the awesome Meta Shades!
September 7th, 2022The Treasure Hunt has begun. Enter the Ready Player Two Hub here.
Below you'll find detailed instructions on how to get the 7 relics listed below:
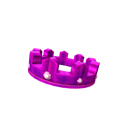
- Crown of Madness
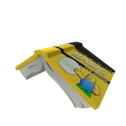
- How to Program BASIC
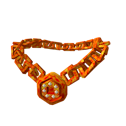
- Bombastic Bling
- 1x1x1x1's Teapot
- Helm of the Rip Tide
- Chaotic Top Hat
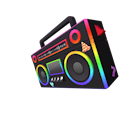
- Rick's Boom Box
Once you acquire the 7 relics you will be rewarded with The META Shades.
Here's a video with instructions for all 7 items.
Note: If you received the badge for the Meta Shades, but did NOT receive the actual item, follow these steps:
- Delete the badge from your Inventory
- Re-enter the game
- Step on the diamond pad at the top of the stairs
- Badge+item will go back into your Inventory
Orientation
Welcome to the Ready Player Two Event!
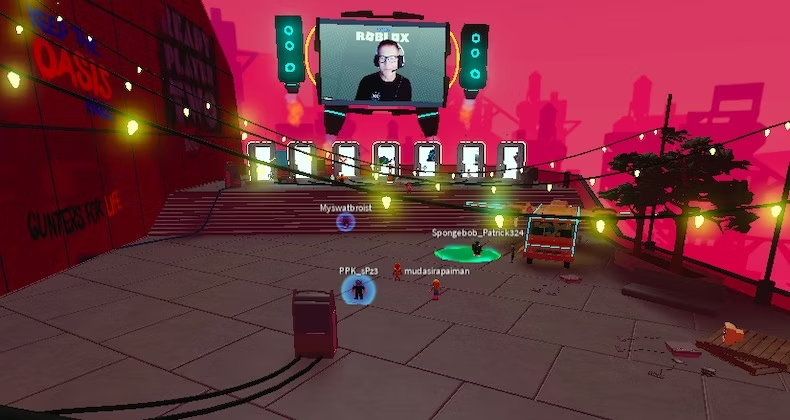
Upon entering this event, you'll find yourself in the Hub where there are 7 doors to the 7 games you must play in order to find the 7 relics.
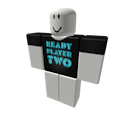
Just by entering here, you should automatically receive two free gifts: The Ready Player Two Book and the Ready Player Two Shirt. Score!
Read on for detailed instructions on how to find each of these items and earn The META Shades!
Contents
- A Note About VIP Servers
- Crown of Madness Relic in Piggy
- How to Program BASIC Relic in Bee Swarm Simulator
- Bombastic Bling Relic in Robloxian High School
- 1x1x1x1's Teapot Relic in Bad Business
- Helm of the Rip Tide Relic in SharkBite
- Chaotic Top Hat Relic in Dungeon Quest
- Rick's Boom Box Relic in Vehicle Simulator
- List of All Relics and Other Items
A Note About VIP Servers
For several of the Ready Player Two quests it’s recommended to use your own private server. This is because you’ll have more control over various aspects that are important for performing the quests successfully.
Unfortunately not all of the games offer free VIP server accounts so take that into consideration. It's not impossible to complete the quests without a VIP server, but in some cases it can be much more difficult.
In case you’re not familiar with private servers, here’s how to create one:
- Go to the game info page (find links below for the games you may want to create VIP servers for).
- Click on the “Servers” tab
- In that tab you will see the price of a VIP server as well as a button that says “Create Private Server”.
- Consider the cost, then if you still want it, click the Create Private Server button.
- A pop-up will appear asking you to name your server. Type the server name you want, then click Get Now.
- It will then ask you if you want to Configure your server, which you don’t need to do unless you want to add friends so if that's not the case, feel free to click Not Now.
- Now whenever you want to play that game, go to the game info page Servers tab and you’ll see your own VIP server there. Simply click Join to play!
Below is a list of the games for which a VIP server is recommended. Again, it is completely possible to complete the quests without a VIP server, however in some of these games it may be more difficult to do so.
- Piggy, 100 R
- Robloxian High School, FREE *Note: Although you'll still see it recommended in instructional videos, having a VIP server is no longer necessary or helpful in completing the quest for this game.
- Bad Business, 100 R
- SharkBite, 10 R
Crown of Madness Relic in Piggy
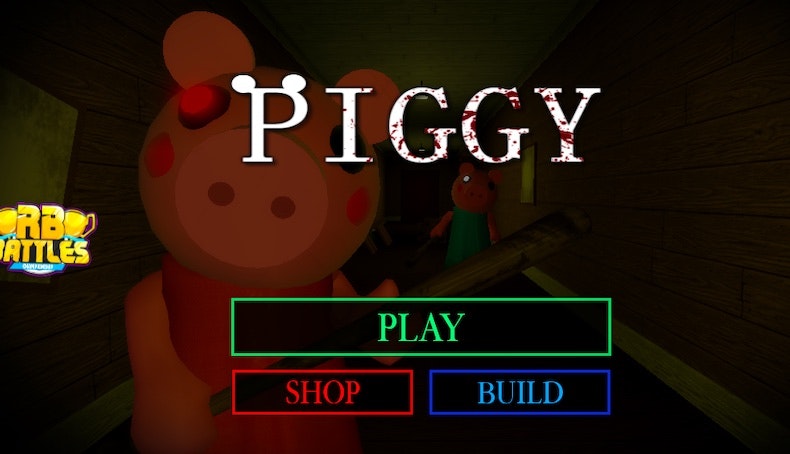
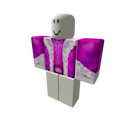
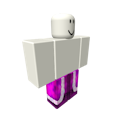
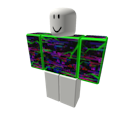
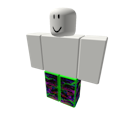
From the Ready Player Two Event Hub, the door on the far left will take you into the Piggy game. By completing my instructions below, not only will you get the First Relic (Crown of Madness), which you'll need in order to earn The META Shades, but you'll also get the Robes of Madness and the Pants of Madness.
Check out this Video Guide, but note that it may be out of date. For all the current details on how to complete this quest, read below!
Instructions:
- Enter the far left door from the Ready Player Two Event Hub, which will open the Piggy game. (If you're using a VIP server, enter the game directly from the game info page as described in the A Note About VIP Servers section.)
- Press Play, then press Book 2.
- In order to complete this task you will have to be on the map called Alleys - Chapter 1, so make sure everyone votes for that one, or select it yourself if you’re in a VIP server.
There are a lot of instructions for this one, so below you'll find it broken down into 3 parts. Read carefully!
Quick Jump:
Part 1: Locks and Keys
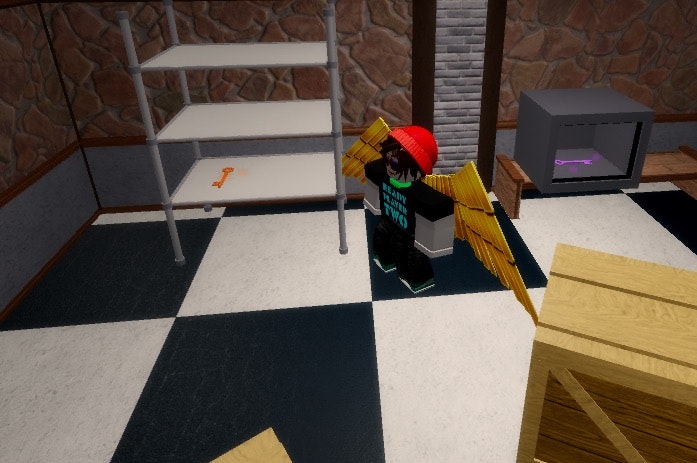
IMPORTANT: Do your best to complete Part 1 before the timer reaches 7:30. This will give you the most time to finish Parts 2 and 3.
Open the Red Lock
- Once you’re in the game, head straight and then turn left when you hit the wall.
- From there keep going straight and enter the door at the end of the alleyway.
- Once through the door, turn right and immediately go through the next door on the right.
- Follow this hallway as it turns to the right and you’ll find the Red Key on a shelf at the end of the hall. Get it. *Note: You can only carry one item at a time, so be sure to use each key on their correct locks right away before getting other keys or items.
- Go through the door just to the left of the vending machine and you’ll see the Red Lock straight ahead and to the right. Unlock it, but don’t enter it yet.
Cut the Tape
- Then turn around and find the Orange Key on a bench against the brick wall. Get it.
- Exit that corner of the alleyway and keep right as you wind around in the street until you see a brown house with an Orange Lock on the door on the left. Unlock it.
- Go through the door you just unlocked and find the Scissors straight ahead and on the right.
- From where the Scissors were, turn around and go through the building, through a cafeteria room, turn right, and exit the door on the left.
- Turn left out of the door and find a doorway that’s taped off on the right.
- Use the Scissors to cut through the tape and enter the building.
Open the Green Lock
- Head up the stairs and you’ll find the Blue Key (looks sort of green-ish, maybe turquoise) on a bench. Get it.
- Head back down the stairs and exit through the door on the right (not the door you came in through).
- Walk straight ahead and you’ll see the Blue Lock on your left. Unlock it and go inside.
- Right inside you’ll see the Green Key. Get it.
- Exit back out the way you came and go through a door that’s straight ahead and to the left.
- To the left you’ll see the Green Lock. Unlock it and go inside.
Mop up the Mess
- Straight ahead you’ll see a very small Mop on the shelf. Get it.
- Exit the building through the door to the left and head straight down the alleyway.
- You’ll end up in the corner where you unlocked the Red Lock. Go through that door now.
- Straight through the door you’ll see a big blue puddle of water. Mop it up.
- Wait here until the timer reaches 7:30, then move on to Part 2.
Part 2: Roll the Dice
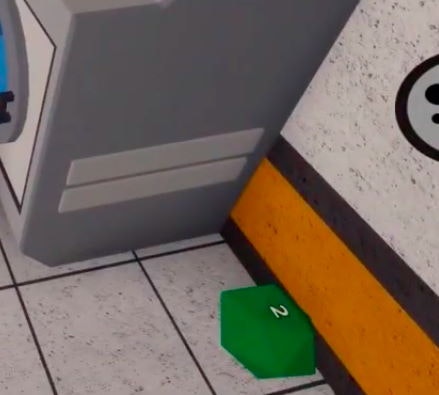
Try to be fast during Parts 2 and 3 as it can be difficult to finish before the game is over.
The Red Die (that’s singular for Dice)
- Once the timer reaches 7:30, click on the door right next to where the puddle was. (It’s the second door from the left in the hallway.)
- Listen to how many knocks you hear and remember that number. We will call this Knock Number 1.
- Then exit back out the way you came and go through the door to the left in the building with the purple and orange lights.
- Go straight, then right, and through the door.
- Turn left after the door and left again through another door, exiting the building.
- Enter a new building through a door on the right.
- Go through the door on the left, turn right, and continue straight down the hallway until you reach some tables and a bench against the wall on the right side. Just past the bench is a Red Die.
- Click on the Red Die the same number of times as Knock Number 1. It will then say that number on the Red Die. Still remember this number as you will use it again later.
The Green Die
- Go back to the hallway with the doors where you got the Knock Number 1 and click on the same door again.
- Like before, listen to the knocks and remember the number. This is Knock Number 2.
- From the door, turn right and go through the small opening at the bottom of the wall.
- Turn slightly to the right and run between the buildings until you get to a building with brick siding and vertical yellow lights on either side of the door. Go through that door.
- To the right in the far corner of the room you’ll find the Green Die.
- Click on the Green Die the same number of times as Knock Number 2. It will then say that number on the Green Die. Still remember this number as you will use it again later.
The Blue Die
- Go back to the hallway with the doors again and click the door once again.
- Once again, listen to the knocks and remember the number. This is Knock Number 3.
- Go back out through the small opening like you did for the Green Die but this time enter the door straight ahead. On the far left corner, you’ll find the Blue Die.
- Click on the Blue Die the same number of times as Knock Number 3. It will then say that number on the Blue Die. Still remember this number as you will use it again later.
- Go back to the hallway with the doors for the last time and click on the door again. This time someone will answer and let you in, bringing you to Part 3.
Part 3: Enter the Catacombs
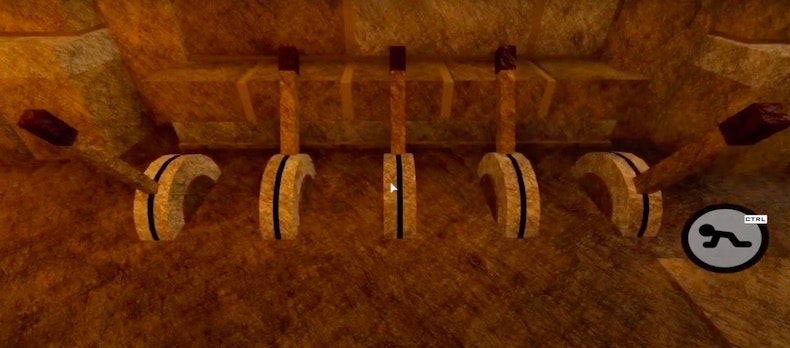
Keep trying to go fast, especially if you used over half of your 7:30 time during Part 2.
Entering the Catacombs
- Without falling into the hole in the middle of the room, head to the far corner on the right side and move the Levers so they’re all leaning toward the wall.
- Once the Levers are all leaning toward the wall a door to the left will open.
- In this room climb up each of the four pillars and repeatedly click on each Torch until it goes out. Make sure all four Torches are out.
- Once the Torches are all out, go back to the first room and move the Levers so that they’re all leaning away from the wall. (A quick way to do this is click on one of the Levers on either the very left or very right side. Then click on the middle of the remaining 3 Levers.)
- Quickly go back through the door to the pillars room before it closes and you’ll see a New Door on the left in that room opening.
- Carefully run through the hallway on the narrow pathway, making sure not to fall into the abyss.
Final Puzzle
- After the narrow pathway you’ll enter a room with Buttons on the walls, all with various shapes on them.
- Find the shapes that have the same number of lines as your Knock Numbers from Part 2 and click on them in the same order as the Knock Numbers. So for example, if Knock Number 1 was 8, find a shape that has 8 lines and click on it first. Then click on one that has the same number of lines as Knock Number 2, then Knock Number 3. Be careful here as you will have to start over if you make a mistake!
- Once you click each Button correctly, a door will open. Go through it, down a long hallway, and out the door.
- You’ll end up back in the hallway with the doors, and you’ll be rewarded your prizes, including the first Relic!
How to Program BASIC Relic in Bee Swarm Simulator
From the Ready Player Two Event Hub, the second door from the left will take you into the Bee Swarm Simulator game. By completing my instructions below, you will be rewarded with the Second Relic (How to Code BASIC), which you'll need in order to earn The META Shades, as well as a special item that can be used in the Bee Swarm Simulator game.
Check out the Video Guide, but note that it may be out of date. For all the current details on how to complete this quest, read below!
Quick Jump:
Preliminary Steps
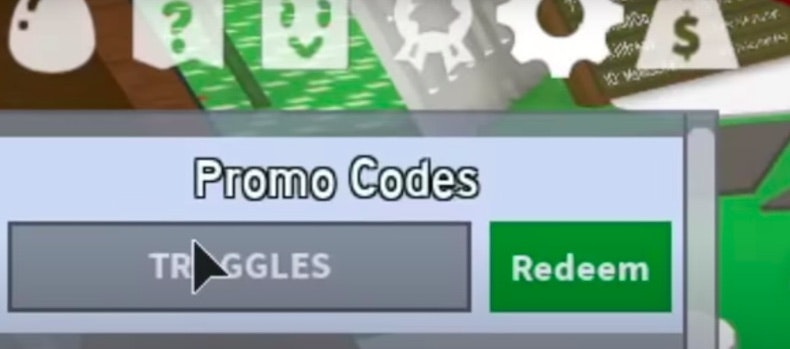
Before you can start the real quest there are several preliminary things you need to do after entering Bee Swarm Simulator.
Enter the Promo Codes At the top left you'll see 6 white icons. The second from the right that looks like a gear is the System icon. Click that.
After clicking the System icon you'll see a place where you can enter promo codes. In no particular order, enter these 7 promo codes:
- Jumpstart
- Dysentery
- Carmensandiego
- Luther
- Millie
- Wordfactory
- Troggles
Get Ingredients For the Strange Goggles Next you'll need to craft the Strange Goggles at the Shop. In order to do this, you need 3 different ingredients:
- 7 7-Pronged Cogs--Don't worry about these as you should already have them in your inventory.
- 1 Micro-Converter--See below for instructions on how to get these.
- 77 Honey--If you're new to Bee Swarm Simulator, see below for instructions on how to get these.
How to Find the Micro-Converter
- From the entrance of the game, head right, then turn left up the ramp.
- Head to the right past the blue 25 and the Christmas tree.
- At the end of the hall you’ll find a big green Computer screen. In front of that Computer are three Micro-Converters!
How to Get Honey If you’ve never played Bee Swarm Simulator, you will have to play the game for just a few minutes in order to get the Honey for your Strange Goggles. You can either read the game instructions or follow those below to get some honey.
- Start a new Hive by walking up to an empty one. There are red arrows on the ground showing you where to find an empty Hive to claim.
- You should have one Egg in your inventory. Click on your inventory icon (the egg shape in the top left of the screen) and drag the Egg from your inventory into one of the green sections of your new Hive. It will then hatch into a Bee.
- Once you hatch a Bee, walk to a green field and let the Bee collect Pollen. You can also collect Pollen yourself by clicking on grass and cutting it with your Tool. You can see how much Pollen you have at the top of the screen. After a minute or two you should have collected enough Pollen to make the Honey you need.
- Return to your Hive and click Make Honey. Wait a few seconds while your character makes honey. This should make more than 77 Honey, which is how much you need to craft the Strange Goggles. If you need more, simply repeat steps 3 and 4 until you have enough.
Craft the Strange Goggles
- Once you have all of the items you need, head to the Shop, which is to the left of the entrance of the game.
- Inside the Shop click Enter Shop and then click the left arrow to find the Strange Goggles. Click Craft Item.
- You will automatically equip the Strange Goggles and will now be ready to begin the Field Quests!
Field Quest
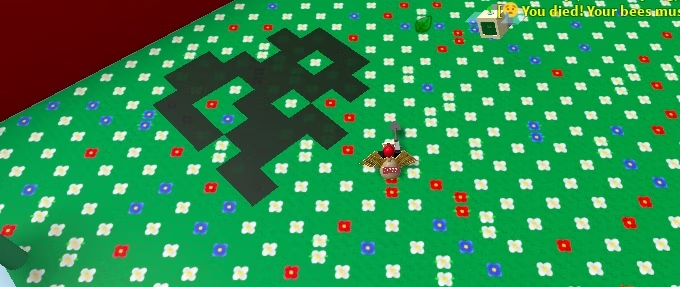
Part 1: Dandelion Field
- After crafting the Strange Goggles, head back to the Computer where you got the Micro-Converters.
- Once you’re at the Computer, click Look Inside the Computer.
- Watch very carefully. First the little square Bee in the middle will make some faces, followed by four punctuation Symbols, such as a ?. Remember those symbols, as well as the order they're in! (Don’t worry, if you forget you can just look in the Computer again.)
- Next head to the Dandelion Field (the one with big, round, white things sticking out of it) behind the entrance of the game. Using your Tool, clear the grass in the field until four dark Symbols are revealed. Note: You will only be able to clear grass if your Pollen Bag isn’t full. This means that if/when your bag is full you’ll have to go back to your Hive and make Honey before continuing.
- Click on each Symbol in the field until they are the ones you saw in the Computer, in order. For example, my computer showed me ?, &, {, and ~ so I clicked on each Symbol in the grass until they were those symbols, reading from left to right. You will know you've done this correctly when the Symbols turn to smiley faces, you hear a success sound, and some items appear.
Part 2: More Fields
- Next go back to the Computer and look inside it again. This time the little Bee will disappear.
- The Bee will teleport around between the Sunflower Field (the field closest to the Computer with big yellow flowers in it), the Mushroom Field (the next field over from the Sunflower Field with big mushrooms in it), and the Clover Field (across the Dandelion Field and up two ladders, has giant green clovers in it).
- Run around between these three fields until you see the Bee. (Watch out for spiders in the Mushroom Field and the Clover Field because they will attack and kill you! However, it’s not a huge deal if you get killed as you’ll just lose your pollen and start back at the entrance of the game, after which you can continue with your mission right where you left off.)
- Once you find the Bee, look closely at it and you’ll see it’s displaying Symbols again, but this time only three. Because the Bee keeps repeating the three over and over, it’s not always clear which is first. This means you’ll have to do some guess work.
- First, find the Symbols in the fields by clearing the grass like you did in the Dandelion Field. There will be one in the Sunflower Field, one in the Mushroom Field, and one in the Clover Field.
- Consider the Sunflower Field to be Field 1, Mushroom Field to be Field 2, and Clover Field to be Field 3. Now try the three symbols the bee gave you in each field until you get the right combination. They should be in the correct order from field 1-3, but it may not be clear which one to start with. So if your Symbols were ?, &, and {, but it didn't work when you put them in the fields in that order, try starting with &, follwed by {, followed by ?. If that doesn't work then the only other options is {, ?, &.
- You’ll know you did it right when the Symbols immediately turn to smiley faces, you hear a success sound, and some items appear nearby.
Part 3: Once More in the Fields
- Go back to the Computer again. This time it will give you four Letters: S, M, D, and C, in a specific order. Remember that order! Each one stands for a specific Field: S for Sunflower, M for Mushroom, D for Dandelion, and C for Clover.
- Go to each of those fields and dig up the Symbol like before. There will be exactly one in each, and they won’t necessarily be in the same places as before. This time the Symbols will not be changeable.
- Keep track of each Symbol you find and which field they were in and put them in the same order as the Letters. For example, if M was the first letter, then whatever Symbol is in the Mushroom Field is the first symbol.
- Once you have all the Symbols, go to the Blue Flower Field (to the left of the Clover Field but on the main level, with big blue flowers), watching out for spiders, and dig out the four Symbols, inputting the ones you found in the other fields in the correct order. For example, let's say your Letters are in this order: M, C, D, S. Then let's say that in the Sunflower Field you found the { Symbol, in the Mushroom Field you found the ~ Symbol, in the Dandelion Field you found the ? Symbol, and in the Clover Field you found the & Symbol. This means that your code is: ~, &, ?, {.
- Once you input the code into the Blue Flower Field and get the smiley faces, head to the Computer one last time. This time once you look in the Computer you will get your reward, which includes a special item in Bee Swarm Simulator, along with your Second Relic, How to Program BASIC!
Bombastic Bling Relic in Robloxian High School
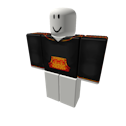
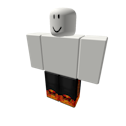
From the Ready Player Two Event Hub, the third door from the left will take you into the Robloxian High School game. By completing my instructions below, not only will you get the Third Relic (Bombastic Bling), which you'll need in order to earn The META Shades, but you'll also get the Bombastic Hoodie and the Bombastic Pants.
Check out the Video Guide, but note that it may be out of date. For all the current details on how to complete this quest, read below!
Quick Jump:
Part 1: School
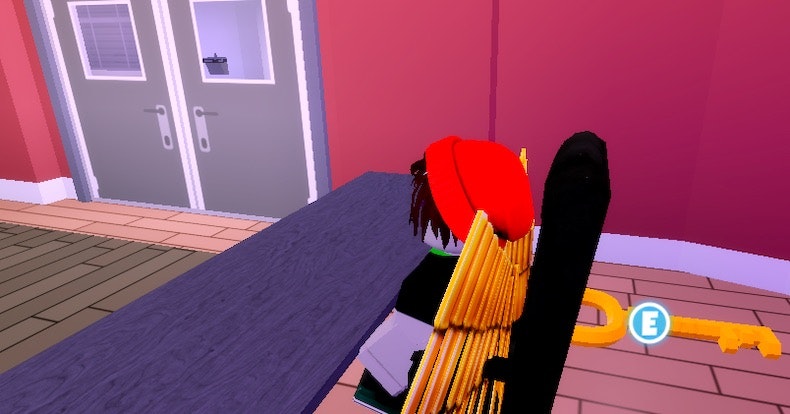
Instructions:
- Enter the third door from the left from the Ready Player Two Event Hub, which will open the Robloxian High School game. (If you're using a VIP server, enter the game directly from the game info page as described in the A Note About VIP Servers section.)
- When you start the game there will be a series of pop-ups to click through. Just click through them--Play, Close, No Thanks.
- Once the pop-ups are done click what looks like a blue Maps Icon toward the bottom right of the screen. It will bring up locations to teleport to.
- Click School.
- Head into the entrance of the School, walk straight down the hall and turn to the left. On your left you’ll see the door to the Library. Enter this door.
- To the left just inside the Library is a desk with two chairs. Sit in the chair closest to the door for 5 game minutes (maybe 10 seconds).
- After 5 game minutes, a Key will appear behind you. Take it.
- Next, leave the Library and turn right, running straight across toward the sign that says Class Rooms.
- Keep following that hallway as it curves to the left until you see two water fountains on the left side.
- Across the hall from the water fountains is a grey Door. Enter it. (That door is what you needed the Key for.)
- On the far corner of the room you will see a Teleporter. Walk through it to teleport to the start of the Obby.
Part 2: Obby
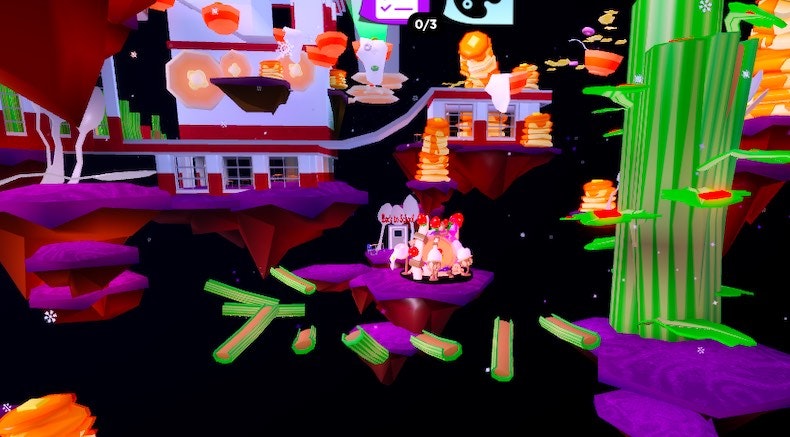
This Obby is quite difficult, but they have made it slightly easier in certain ways. For example, they have added checkpoints so you don’t have to start from the beginning every time you die.
Below are a few tips that will hopefully make your Obby experience a little easier:
Change Your Avatar Proportions
- Click the red Dress Up button on the right side of the screen.
- From there click the circular button with a picture of a shirt and a hat.
- In the menu, click Tuning.
- Put everything to the smallest it goes. Height may not make a difference, but width will definitely help with some of the difficult jumps.
Check Points Are Your Friend
- As noted above, there are now check points in this Obby. There are also some helpful bugs that may teleport you to a checkpoint ahead of where you were when you died.
Once you complete the Obby, there will be a teleporter on the other side. Step through it and you’ll receive your rewards, including the third Relic!
1x1x1x1's Teapot Relic in Bad Business
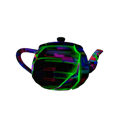
From the Ready Player Two Event Hub, the fourth door from the left will take you into the Bad Business game. By completing my instructions below not only will you get the Fourth Relic (1x1x1x1's Teapot), which you'll need in order to earn The META Shades, but you’ll also get the 1x1x1x1's Shirt and 1x1x1x1's Pants.
*Note: This quest will be slightly easier if you use a VIP server but it’s not impossible to do without one.
Check out the Video Guide, but note that it may be out of date. For all the current details on how to complete this quest, read below!
Quick Jump:
Part 1: Puzzle Pieces
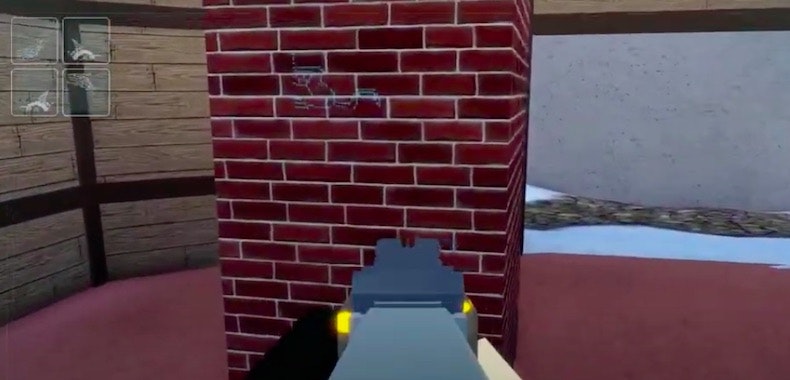
Preliminary Setup
- First, in the opening screen of the game, click the little Gift Icon toward the bottom.
- Enter this promo code: unicorn -- This unlocks the VR Goggles.
- Click Close, then Back, then Outfits.
- Click Face 2, then click on the VR Goggles to equip them.
Starting the Quest
- Back on the main screen, the top left corner shows you which map is currently being used. If you’re not using a VIP server, you’ll have to wait for a round that takes place at the map you want to use.
- Many people seem to think the Factory TDM map is the easiest one for this quest, but it is possible in any map. However, below I have written detailed instructions on how to find 5 of the Puzzle Pieces, as well as the Door in the Factory TDM map.
- Once the top left corner is set to the map you want, click Deploy.
- You will need to find at least four Puzzle Pieces. There will be eight in the map, but only four that you will end up using in the puzzle.
- The Puzzle Pieces will look like little scratches in walls or other objects throughout the map. Once you find one, center it in your sight for a few seconds to scan it.
- Once you find enough Puzzle Pieces, you’ll need to find a Door, which will also be etched into a wall somewhere.
If you’re using the Factory TDM map, you can follow the instructions below for the locations of five of the Puzzle Pieces.
If you’re not using the Factory TDM map, find the Puzzle Pieces and the Door in your map, then skip to Part 2: Door to the Zombies section.
Part 1.1: Factory TDM
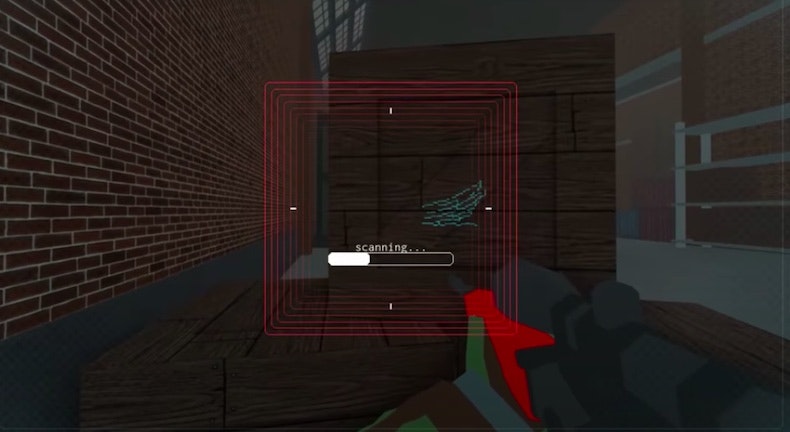
- From the game entrance, head straight forward until you reach a doorway on the far right side with some crates piled in the corner.
- Walk around to the back side of the crates and you’ll see something scratched into one of them. That’s the first Puzzle Piece.
- Face the Puzzle Piece for a minute to scan it.
- Next, head through the doorway next to the crates and turn left down the ramp.
- Continue straight, past a big, white truck, to another pile of crates.
- Jump on this pile of crates, onto the giant crate, then jump across into a building with orange construction cones in it.
- Head to the back right of the room where there’s a large gas tank of some sort.
- To the left of the tank, scratched into the brick, is your second Puzzle Piece.
- Face the Puzzle Piece for a minute to scan it.
- Once you’ve scanned the second Puzzle Piece, jump down out of the building where you entered it and head slightly to the right toward the back of the big white truck.
- You’ll find a big red basin. Jump in the basin and scratched into the bottom toward the left wall you’ll find the third Puzzle Piece.
- Face the Puzzle Piece for a minute to scan it.
- Jump out of the basin on the opposite side from where you jumped in and head straight toward a stairway. Head up the stairs.
- From the top of the stairs go straight and turn right up a ramp.
- Continue down the hall to the left of the ramp until you see another pile of crates.
- Scratched into the brick behind the crates is your fourth Puzzle Piece.
- Head back the way you came, back down the ramp.
- From the bottom of the ramp, jump out the window onto a green roof.
- Directly to the right, scratched into the brick, is your fifth Puzzle Piece.
- Next jump back in the window you came from and head toward the ramp again.
- Instead of going up the ramp, jump out the window directly to the right of it.
- Jump down to the street and head slightly left, toward a green car.
- Go past the green car, through a doorway, and turn right.
- Head straight toward another ramp.
- Just before the ramp, scratched into the brick on the left, is a Door.
Part 2: Door to the Zombies
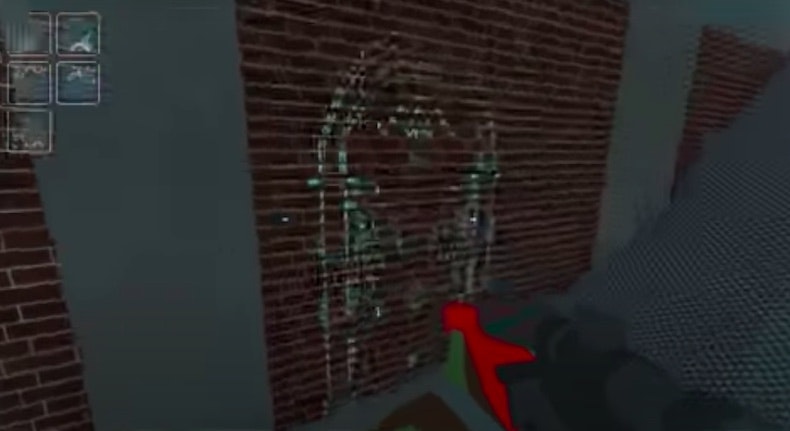
- Once you have at least four Puzzle Pieces and you've found a Door, it's time to do the puzzle.
- Place the Puzzles Pieces in correctly to make a picture and open the Door. If you can’t seem to make the picture and you don’t have all eight Puzzle Pieces, you may have to go back and find more.
- Once you’ve placed the Puzzle Pieces correctly, you’ll be teleported to Operation Unicorn (this may take a few minutes).
- Once you see the opening screen, hit Begin.
- You will appear in a new location where you must fight or evade zombies. *Hint: You have 10 lives, and if you crouch you cannot be killed.
- There will be something showing you where to go, so just follow that and do your best not to get killed.
- Once you reach a part of the map that turns all white, just keep walking straight and you’ll eventually see 1x1x1’s Teapot. Touch it and you’ll get it along with the other rewards!
Helm of the Rip Tide Relic in SharkBite
From the Ready Player Two Event Hub, the fifth door from the left will take you into the SharkBite game. By completing my instructions below not only will you get the Fifth Relic (Helm of the Rip Tide), which you'll need in order to earn The META Shades, but you’ll also get the Armor of Riptide and Armor of Riptide Pants.
Note: This quest will be slightly easier if you have a VIP server.
Check out the Video Guide, but note that it may be out of date. For all the current details on how to complete this quest, read below!
Quick Jump:
Part 1: Buoys
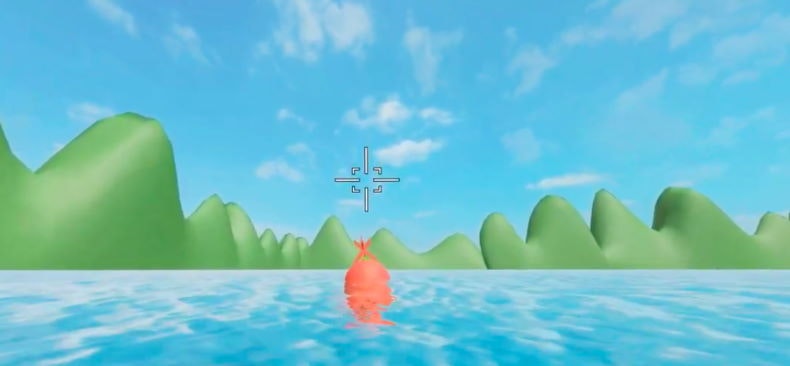
- Start the game out in SharkBite as the Shark. If you’re using a VIP server, this will be pretty easy. If not, you will likely have to play a few rounds before you’re selected as Shark. Luckily the more rounds you play, the higher your chances of being selected. You can also spend 15 Robux to increase your chances, but that doesn’t make any sense if it’s only for the purpose of this quest because you can purchase a VIP server for just 10 Robux.
- Once you’re the Shark, find the four big, red Buoys floating in the water in each corner of the map and run into them. After running into them, they will disappear.
- Once you’ve run into all four Buoys, your Boost should turn into a Super Boost (but don’t use it yet!).
- Head to the central island with the lighthouse on it.
- Underwater on the side of the island where there’s a sea arch in the cliff, you’ll find an area under the water with green cracks in it.
- Super Boost into those cracks and they will crack open.
- Once the wall is cracked open, you’ll meet a clown fish named Lennard. After meeting Lennard, let that game round end.
- During an Intermission between rounds, walk up to the Jaws poster in the lobby, press the button nearby, and you will get four Super Buoys. (It used to be that you had to type, “You’re Gonna Need a Bigger Boat” into the chat while facing the poster, but sources say that is no longer the case.)
Part 2: The Titanic
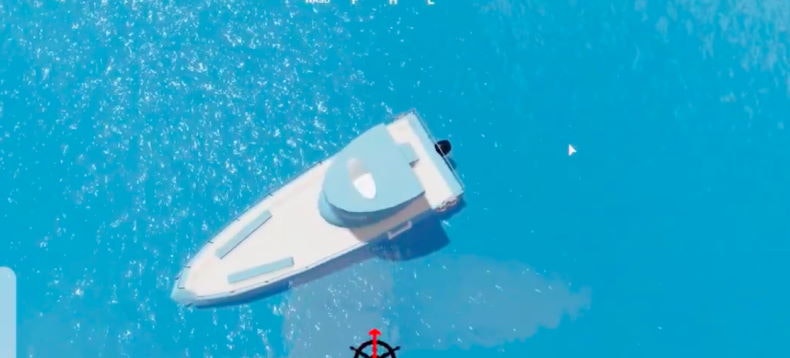
- Once you have the Super Buoys, start a new game round as a human. Now you’ll need to find the sunken Titanic ship at the bottom of the ocean.
- To find it, first head out from the side of the main island with the glass wall. Sail away from the island on that side until you see an empty island on the left and a single red buoy on the right.
- If you go directly away from the main island, somewhere in between the red buoy and the empty island (buoy on right, empty island on left), the Titanic should be under water a little ways past the empty island and the buoy. During daylight you can just barely see the ship from the water surface--It looks like pale, grey shapes (see the bottom part of the picture above for an example).
- Once you’ve found the Titanic, jump off your boat and dive down to it on the ocean floor.
- Place two of the Super Buoys to the front two black hooks on the Titanic deck.
- Place the other two Super Buoys on big hooks on the back of the Titanic.
- Once the four Super Buoys are attached, they’ll float the ship up to the surface and blast it into space.
- Once you’ve removed the Titanic, go back to Lennard the clown fish in the cave under the main island.
- Lennard will give you an Emerald.
- Once you have the Emerald, wait for the game round to end.
- Quickly during an Intermission, from the lobby go to the center where there are constant white platforms rising up.
- Step on one of the platforms and allow it to lift you to the top of the lighthouse.
- Once you reach the top, step off the platform and out the door to the outer railing area of the lighthouse top where you’ll see a Telescope.
- Put the Emerald in the Telescope, then aim it toward the sun or the moon, depending on what time of day it is.
- Pointing the Telescope at the sun or moon will trigger a portal to open. Enter that portal, which will teleport you to the Boss Battle.
Part 3: The Boss Battle
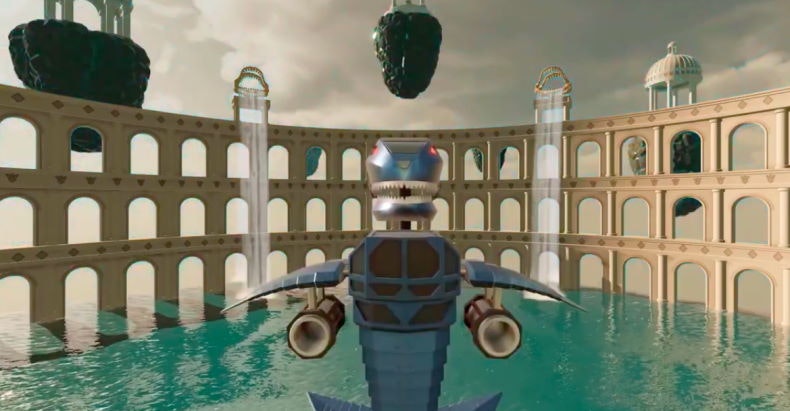
- There are four stages to the boss fight, during which you simply need to avoid taking damage. At the end of each stage the boss will shoot three Homing Missiles at you. Lead the Missiles back into him by circling around so they hit him instead of you.
- In the First Stage, there will be a red laser circling the area. Simply drive your boat in a circle to avoid the laser.
- For the Second Stage, rocks will be falling from the sky. They will first cast shadows on the water so watch those in order to avoid the rocks.
- The Third Stage will have another red laser, which you’ll again drive in a circle to avoid.
- The Fourth Stage used to involve the falling rocks and the red laser, but some sources say it has now been made easier and just has another red laser.
- If you manage to hit the boss with the Missiles every time, you will win at the end of the Fourth Stage. If not, it will start back over again at the First Stage.
- Once the boss is dead, the game will restart. Once you re-enter the game the ocean will have parted so there’s an open pathway on the ocean floor.
- Walk down the pathway, being sure to avoid the Shark flying around there.
- At the end of the pathway, you’ll find the Helm of the Rip Tide, and get your other rewards as well!
Chaotic Top Hat Relic in Dungeon Quest
From the Ready Player Two Event Hub, the second door from the right will take you into the Dungeon Quest game. By completing my instructions below you will get the Sixth Relic (Chaotic Top Hat), which you'll need in order to earn The META Shades.
Check out the Video Guide, but note that it may be out of date. For all the current details on how to complete this quest, read below!
Quick Jump: Part 1: The 7 Gems Part 2: Asset Holder Dungeon
Part 1: The 7 Gems
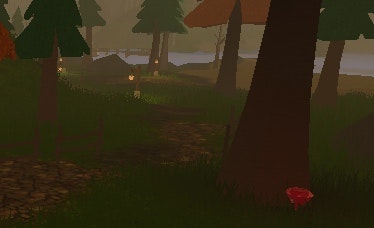
For this part of the quest you have to find 7 Gems and touch them in a specific order: Red, Yellow, Blue, Cyan, White, Purple, and Green.
When you find each Gem, run your character into it. Nothing noticeable will happen, but it’s important that you touch each Gem in order.
Here's where to find all 7 Gems:
Red Gem
- From the entrance of the game, head Left down the path. Keep following the path straight past the town area and slightly to the right into the forest.
- When the path begins to curve more strongly to the right, you’ll see a fence and a large tree on the left.
- On the other side of that tree is the Red Gem.
Yellow Gem
- From the location of the Red Gem, head back up the path the way you came.
- After you cross the bridge, take a left up a rocky ridge and cross in front of the house with the blue roof, then turning slightly to the left to head behind the house with the red roof.
- Continue in the same direction and you’ll see a larger building on the right. Behind it is the Yellow Gem.
Blue Gem
- From the location of the Yellow Gem, head in the same direction across the back of the large building, then keep slightly to the left to stay on the ridge.
- As the hill gently slopes down, you’ll find the Blue Gem behind a tree.
Cyan Gem
- From town, head down the path again to the bridge.
- When you get to the bridge, jump in the river.
- Dive down and turn to the left into a cave, where you’ll find the Cyan Gem.
White Gem
- Cross the bridge to the far side of the river from town.
- After crossing the bridge, turn right up the rocky ridge (this is on the opposite side of the river from where you went when headed for the Yellow Gem).
- Turn left onto the deck with the fence and barrels and continue in that direction into you get to the other end of the deck.
- At the end of the deck, turn slightly right up the hill to a tree. Behind that tree is the White Gem.
Purple Gem 23. From the river, head back toward town and take a right onto the dock. 25. At the far left corner of the dock, jump into the water and swim across to the grassy land slightly to the left. 26. Continue along the beach. When you cross over a rocky ridge with some trees on the other side, turn left before the trees and you’ll see the Purple Gem.
Green Gem
- From town, head in the opposite direction from the river.
- Go through the archway in the building with the blue roof.
- Continue down the path to the cave that appears to be blocked by rocks.
- Jump on the rocks so you can squeeze through the crack at the top of the entrance.
- Continue down the cave, into the blackness, which will then teleport you to a new room.
- Hope up the wooden blank stairway on the right side of the room and continue along that ledge, hopping across another set of blanks, until you see a pink crystal platform on the left side.
- From the pink crystal platform, jump up the hanging plank stairway, then up the dowels sticking out from the wall, landing on the platform on the left side.
- Cross the narrow bridge on the left, carefully jumping across the hole in the middle.
- Walk straight ahead from the bridge through the dark door, and you’ll find the Green Gem.
Once you've touched all the Gems in the correct order, you're ready to move on to Part 2: Asset Holder Dungeon
Part 2: Asset Holder Dungeon

Getting to the Dungeon
- Once you’ve touched the final Gem, head out of the cave the way you came in and head back into town.
- At this point you used to have to go view blinking lanterns to get a code, but sources say that is no longer necessary and that the code now appears at the gate.
- To get to the gate, head back to the bridge and go up the river to the right and the gate will be at the end of the river.
- Enter the code into the keypad and you will be teleported to Asset Holder.
The Dungeon
- Asset Holder is a timed dungeon. You have 10 minutes to get through the Obby and defeat the Boss. If you lose all your lives or run out of time, you’ll have to enter the dungeon all over again. Luckily, if you fall into the abyss during the Obby you will not lose any lives, just time.
- You’ll encounter two Energy Barriers, which you can break through by repeatedly attacking them.
The Boss
- When you get to the boss, named The Glitch, keep an eye on the patterns on the floor to see where you should avoid so you don’t take damage.
- Sometimes the lasers will fill the entire room, but there will be objects in the room you can hide behind in order to avoid damage.
- Then when possible, run up to attack. Another strategy is to avoid attacking and just use the Q and E abilities instead.
- Periodically grey and red Power Cores will appear and The Glitch will use them to heal. Attack and destroy the Power Cores so he can’t do that.
- Once you defeat The Glitch, you will be rewarded with the sixth Relic, the Chaotic Top Hat!
Rick's Boom Box Relic in Vehicle Simulator
From the Ready Player Two Event Hub, the second door on the very right will take you into the Vehicle Simulator game. By completing my instructions below you will get the Seventh Relic (Rick’s Boom Box), which you'll need in order to earn The META Shades.
Check out the Video Guide, but note that it may be out of date. For all the current details on how to complete this quest, read below!
Quick Jump: Part 1: Pawn Corp. Laboratory Part 2: The 8 Disks
Part 1: Pawn Corp. Laboratory
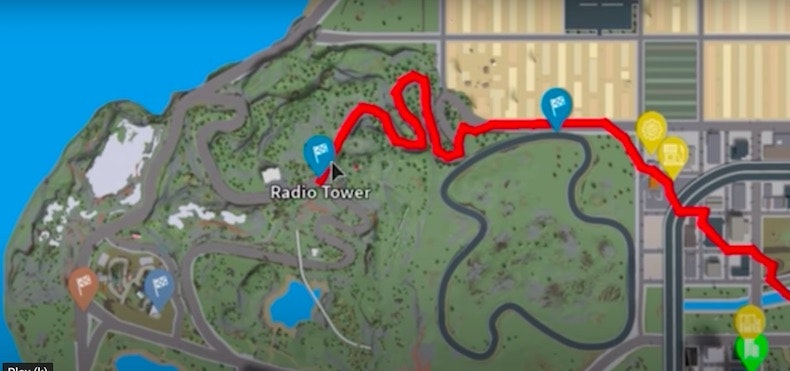
Once you’ve chosen your mode of transportation, you’ll want to go to the Pawn Corp. Laboratory.
Directions to Pawn Corp. Laboratory (also see map above):
- Head to the top left (Northeast) corner of the main double-road rectangle.
- Continue in the Northeast direction until you get to a section of road with a series of tight hairpin turns.
- Drive through the turns and through the tunnel that follows.
- Keep right after the tunnel and the Pawn Corp. Laboratory will be on your right.
- Park there and exit the vehicle.
Find the Secret Area
Inside Pawn Corp. Laboratory you'll find a Vending Machine on the back wall. Click on the buttons on the right side of the Vending Machine in this order:
- Chocolate Donut on the top left
- Hot Dog on the top right
- Cola under the hot dog on the right
- Pink Donut on the bottom left
- Glazed Donut on the middle left
- Hot Dog again on the top right
- Cola again under the hot dog
You will know you’ve done this right when you hear a voice say, “Access Granted” and the floor will lift in the middle of the room to reveal an elevator. Quickly step on the elevator before it lowers back down. If you don’t get to it in time simply enter the code again on the Vending Machine.
Get the Goggles
From the bottom of the elevator, run straight ahead down the hall until it opens up into a round room. To your left against the wall on the floor will be a pair of Goggles. Pick them up and hit Purchase.
The Goggles will give you the ability to find 8 disks around the map, which will be covered in Part 2: The 8 Disks.
Part 2: The 8 Disks
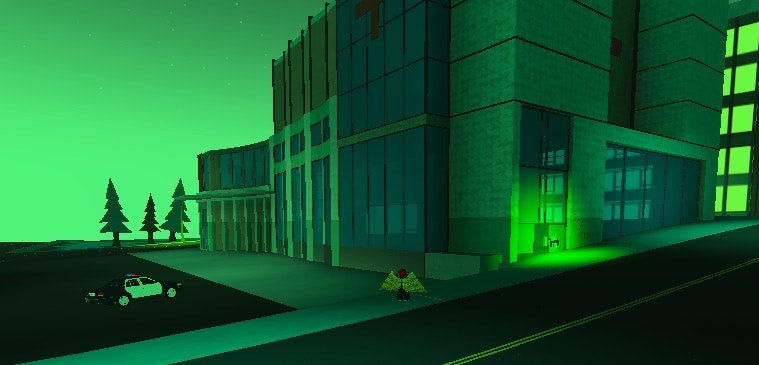
Put on the Goggles
Once you have the Goggles, access your phone by typing E on the keyboard. Open up Settings and click Pawn Labs AR Goggles, then click On.
This will turn your vision green and allow you to see the 8 Disks by making them glow bright green. It will also emit a beeping sound when you're near one of the disks, which grows louder the closer you get.
The 8 Disk Locations
- Disk 1: At the top of the crane in the small group of buildings to the top left of the map, near the giant donut. To get to it, make sure you climb one side of the ladder inside the crane so you can jump off onto the platform where the disk is, or climb to the top of the crane and drop down to the platform.
- Disk 2: In a barn in the bottom left corner of a farm area at the top of the map
- Disk 3: On the inner left side of the large, double-road rectangle on the right side of the map, in a garage.
- Disk 4: In a storage container under a large, red-roofed shelter on the very right side of the map at the end of a loading dock area.
- Disk 5: In a large, dark grey building on the right side of the map, slightly south of a brown dock that goes out to the water.
- Disk 6: On the left side of the race track area at the bottom right of the screen, behind a large billboard.
- Disk 7: In the cluster of buildings in the bottom left corner of the map, head to the top block and find the disk toward the bottom left of that block, on the side of the hospital oppite from the trees.
- Disk 8: In the mountains just to the Northeast of Disk 7, next to a campfire and to the right of a tunnel.
Once you’ve collected all of the 8 Disks, you'll see a short cut-scene in which the lasers in the secret area of the Pawn Corp. Laboratory disappear.
Final Steps:
- Head back to the Pawn Corp. Laboratory, enter the code again like in Part 1, and go back down the elevator.
- Once you’re at the round room again, take a left and another left through the door (before running into the acid pool).
- From there, follow the stairways down, down, down, but be careful beacuse if you fall you will die and have to start back at the starting point of the game. (Luckily you will still have all the disks, you’ll just have to drive back to the Pawn Corp. Laboratory.)
- At the bottom of the stairs you’ll come out to an underground roadway.
- Head down the road to the left, walking along the left edge of the acid so you don’t fall in and die.
- Once you’re past the acid, you can spawn a car and drive to save time.
- Drive straight down the tunnel until you see an opening on the right side.
- At the opening, hop out of your car and go through the doorway on the right.
- Through the door on against the wall on the right side of the room you’ll find a computer with numbers.
- Type in the code 1985, then hit OK.
- Once you type in the code correctly, the computer will say Rocket Activated.
- Go into the rocket room through the door right behind you and sit in a chair.
- Watch as you get blasted into space!
- At this point, you will have the badge and the 8th Relic, Rick’s Boom Box! You can also purchase the car if you like and go through the portal to be teleported back to the Pawn Corp. Laboratory if you'd like to continue playing.
If you're having trouble, check out this video on exactly how to complete this ending part.
All Relics and Other Items
Below is a list of all the Relics and other items from the Ready Player Two Roblox event.
